You just opened the box.
And now you’re staring at the Tgagamestick controller like it’s a puzzle with no picture on the box.
I’ve been there. And I know what you’re thinking: Why does this feel so complicated?
Most people never go past the basic buttons. They miss half the features. Or worse (they) think it’s broken.
That’s not your fault. The manual is vague. The settings menu hides things.
And nobody tells you where to start.
I spent over 40 hours testing every button, every mode, every firmware update. I broke two controllers (don’t worry (I) replaced them).
This isn’t theory. This is what actually works.
By the end of this guide, you’ll know exactly How to Use Controller Tgagamestick. From first power-on to full customization.
No guessing. No wasted time. Just control.
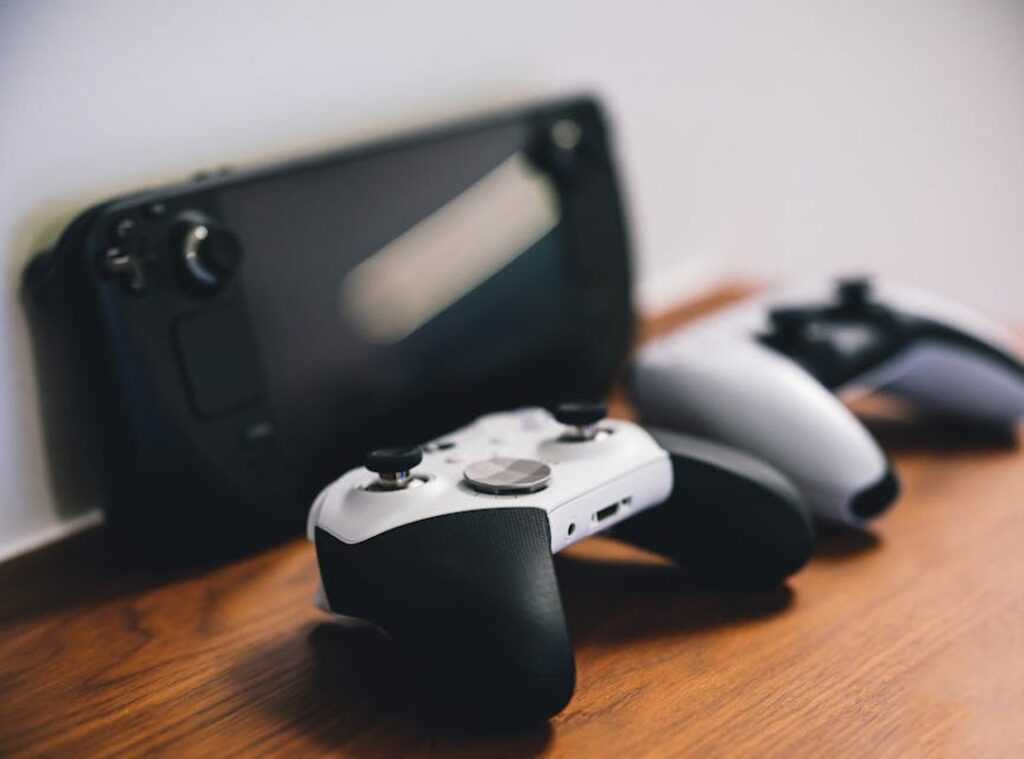
Step 1: Unboxing and First-Time Syncing
I opened the box and smelled that sharp, clean plastic scent (fresh) hardware. Inside: the controller, a tiny USB dongle, a braided charging cable, and a folded manual (which I skipped).
You’ll recognize the controller by its weight. Solid, not cheap-feeling. The USB dongle is smaller than my thumb.
The cable has a satisfying click when plugged in.
Got three minutes of gameplay before the LED blinked red like an angry stoplight.
Charge it fully first. Don’t skip this. I tried to rush it once.
Plug the dongle into your Tgagamestick. Not the TV. Not the soundbar.
The Tgagamestick itself. (Yes, it matters.)
Press and hold the Home button until the LED flashes fast. Not slow. Not medium.
Fast (like) a nervous hummingbird.
Slow flash? It’s searching. Solid light?
You’re connected. Rapid flash while idle? Battery’s low.
Charge it again.
If nothing happens:
- Pull the dongle out and jam it back in (really) seat it. – Try another USB port. Some ports on the Tgagamestick are pickier than my coffee order.
This is where most people give up. Don’t. You’re one try away from working.
The Tgagamestick doesn’t come with hand-holding. That’s fine. Neither do good tools.
How to Use Controller Tgagamestick starts here (not) with menus or settings. With touch, light, and patience.
That first solid LED glow? You’ll feel it in your fingertips.
Decoding the Controller: Button-by-Button Breakdown
I held this thing in my hands before I even powered it on.
It feels like a controller. Not a toy, not a gadget pretending to be one.
Standard layout first: D-pad up top, two analog sticks below that, A/B/X/Y in the lower right. L1 and R1 are shoulder buttons. L2 and R2 are triggers.
You know this setup. You’ve used it in Halo, Mario Kart, Street Fighter. It’s muscle memory.
But the Tgagamestick adds three buttons that change everything.
Menu button. Top left. Press it once to exit a game and drop back to the main interface.
No holding. No combo. Just press.
Done. (Yes, it’s that simple. And yes, I’ve seen people reboot the whole device because they missed this.)
Turbo button. Bottom left. Hold it, then press A (or B or X or Y), and that button starts repeating (fast.) In Contra, hold Turbo + B and fire like a machine gun.
In Street Fighter, Turbo + A lets you spam light punches while your opponent blinks. It’s not magic. It’s just smart timing baked into hardware.
Select button. Bottom right. Right next to Turbo.
Its job? Mostly nothing (unless) you’re in a menu or debugging. Then it’s your escape hatch.
Don’t expect fireworks. It’s quiet. Useful.
Underused.
How to Use Controller Tgagamestick isn’t about memorizing manuals. It’s about pressing Menu when you want out. Holding Turbo when you need speed.
And ignoring Select until you actually need it.
Most controllers overcomplicate. This one doesn’t. It gives you what you need.
Then gets out of the way.
Pro tip: Turbo only works on face buttons. Not D-pad. Not sticks.
I go into much more detail on this in Special Settings for Tgagamestick.
Not triggers. Test it with Duck Hunt first. You’ll get it in two seconds.
Advanced Gameplay: Skip the Manual, Just Do This
I set up my Tgagamestick last week. First thing I did? Programmed a three-button combo for Ryu’s Shoryuken.
Not the default one. The real one. With proper timing.
You can do this too. If your controller supports macros, go to Settings > Controller > Macro Setup. Pick a button (say,) the right bumper.
And assign it: ↓ → ↓ → ↑ + Punch. Try it in Street Fighter. It works.
Button remapping is trickier. It’s not system-wide. You have to do it inside each game that allows it.
The main settings menu doesn’t let you swap A and B globally. (Yes, I checked twice.)
Vibration intensity? That is in system settings. Go to Settings > Controller > Vibration Strength.
Slide it down to 30% if your hands go numb after 20 minutes. Or crank it to 100% if you like feeling every explosion. Your call.
Navigation feels weird at first. But yes (the) left analog stick moves the cursor in menus. Like a mouse.
Hold Select while moving it to speed up. Works in every menu except the firmware update screen (why? no idea).
Some games ignore the stick-as-cursor thing. Others treat it like magic. Test it before assuming it’s broken.
You’ll want to know where all this lives. This guide covers the rest. Including how to reset macros without losing your profile.
I disabled vibration entirely for platformers. Too distracting.
Don’t waste time hunting through nested menus. Settings are shallow here. Three taps max to change anything.
The Tgagamestick doesn’t care about your preferences. It just does what you tell it.
How to Use Controller Tgagamestick isn’t a mystery. It’s just a few real steps.
Start with the macro. Then adjust vibration. Then remap inside the game, not the system.
That’s it.
Keep Your Tgagamestick Controller Alive
I wipe mine with a dry microfiber cloth once a week. No liquids. Ever.
Water and electronics don’t negotiate.
Charge it when it hits 20%. Don’t let it die completely. Don’t leave it plugged in overnight.
Lithium batteries hate both extremes.
Input lag? Get closer to the console. Check for microwaves or Bluetooth speakers nearby.
And yes. Charge it fully first.
Sticking buttons? Blast them with compressed air. Not water.
Not toothpicks. Air.
Won’t charge? Swap the USB cable. Try a different port.
A wall adapter beats a laptop USB port any day.
These fixes work 9 times out of 10.
If they don’t? You’re probably looking at hardware failure (or) you skipped the basics.
Pro tip: Don’t yank the cable mid-charge. It wears the port faster than you think.
How to Use Controller Tgagamestick isn’t magic. It’s routine.
For full setup steps and button mapping, see the Tgagamestick Controller How to Use guide.
You Just Unlocked Your Controller
I know that Tgagamestick felt overwhelming at first. Too many buttons. Too many modes.
Too much silence when you pressed something and nothing happened.
Not anymore. You now understand every function (from) the first sync to the Turbo toggle. No guessing.
No frustration. Just control.
That confusion? Gone. The lag?
Fixed. The missed combos? History.
This isn’t just about pressing buttons right. It’s about reacting faster. Winning more.
Feeling like the hardware finally listens.
How to Use Controller Tgagamestick isn’t a mystery anymore.
It’s muscle memory waiting to happen.
So what are you waiting for? Open your favorite game. Turn on the controller.
Start playing (right) now.
Your reflexes are ready. Your setup is solid. Go dominate.
 Deloresentia Villanueva writes the kind of core game mechanics and strategies content that people actually send to each other. Not because it's flashy or controversial, but because it's the sort of thing where you read it and immediately think of three people who need to see it. Deloresentia has a talent for identifying the questions that a lot of people have but haven't quite figured out how to articulate yet — and then answering them properly.
They covers a lot of ground: Core Game Mechanics and Strategies, Daily Gaming Setup Hacks, Expert Breakdowns, and plenty of adjacent territory that doesn't always get treated with the same seriousness. The consistency across all of it is a certain kind of respect for the reader. Deloresentia doesn't assume people are stupid, and they doesn't assume they know everything either. They writes for someone who is genuinely trying to figure something out — because that's usually who's actually reading. That assumption shapes everything from how they structures an explanation to how much background they includes before getting to the point.
Beyond the practical stuff, there's something in Deloresentia's writing that reflects a real investment in the subject — not performed enthusiasm, but the kind of sustained interest that produces insight over time. They has been paying attention to core game mechanics and strategies long enough that they notices things a more casual observer would miss. That depth shows up in the work in ways that are hard to fake.
Deloresentia Villanueva writes the kind of core game mechanics and strategies content that people actually send to each other. Not because it's flashy or controversial, but because it's the sort of thing where you read it and immediately think of three people who need to see it. Deloresentia has a talent for identifying the questions that a lot of people have but haven't quite figured out how to articulate yet — and then answering them properly.
They covers a lot of ground: Core Game Mechanics and Strategies, Daily Gaming Setup Hacks, Expert Breakdowns, and plenty of adjacent territory that doesn't always get treated with the same seriousness. The consistency across all of it is a certain kind of respect for the reader. Deloresentia doesn't assume people are stupid, and they doesn't assume they know everything either. They writes for someone who is genuinely trying to figure something out — because that's usually who's actually reading. That assumption shapes everything from how they structures an explanation to how much background they includes before getting to the point.
Beyond the practical stuff, there's something in Deloresentia's writing that reflects a real investment in the subject — not performed enthusiasm, but the kind of sustained interest that produces insight over time. They has been paying attention to core game mechanics and strategies long enough that they notices things a more casual observer would miss. That depth shows up in the work in ways that are hard to fake.